Camera (Viewpoint) Control #
By changing the viewpoint (camera) you can adjust the orientation and distance of the entire scene, including CG agents. You can also create camera direction by setting a sequence of camera movements as a motion.
The camera can also be controlled with keys and the mouse. This page explains the following about camera viewpoint settings:
- Changing and setting position and parameters
- Setting transition speed
- Auto-follow and bone mounting
- Playing camera motions
Setting the camera #
You can specify viewpoint parameters with the CAMERA command.
- x,y,z: Camera position coordinates
- rx,ry,rz: Camera rotation values
- distance: Distance from the screen center to the camera
- fovy: Field of view (unit: degrees)
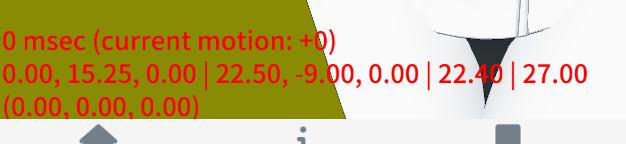
Press the d key and the numbers shown on the second line in the lower-left are the current camera parameter values. They are output in the same format accepted by the CAMERA message, so after adjusting the camera with keys or the mouse you can use these displayed values.
Setting movement speed #
When you send camera parameters with a CAMERA message, the camera smoothly moves from the current state to the specified position over roughly one second. To change this movement speed, specify the 5th argument: the transition time period. By specifying a value greater than 0, the camera will move at a constant speed over that many seconds. The example below moves to the specified position over five seconds.
Specifying 0 switches immediately to the given parameters with no transition.
If omitted, the default is -1 (smooth transition).
Auto-follow the camera to a model #
If a model moves around the scene, it can sometimes move out of view. To mitigate this, you can make the camera automatically follow the model’s horizontal movement.
To use this, provide the model alias name as the 6th argument of the CAMERA parameters. When a model is specified, the camera first moves to the given parameters, then begins auto-following the model’s left-right movement. (Technically, it follows the model’s “Center” bone.)
In this case, the 5th argument (the 1 above) specifies the camera’s behavior relative to the model’s movement. A value of 0 makes the camera follow the model’s movement with no delay. A positive value causes the camera to follow the model with some lag. Adjust this according to your needs.
Mounting the camera to a bone #
By specifying a bone name after the model alias, you can mount the camera to a specific bone and have it follow that bone. The mechanism is the same as the model auto-follow described above.
Using camera motions #
You can reproduce camera work by specifying a pre-defined camera motion file (.vmd). Camera motions can be created with MMD tools. Use a camera motion file (.vmd) like this: