Background, Floor, and Frame #
The main subject in a voice interaction is, of course, the CG character itself, but ancillary information such as the background and frame displayed on screen should not be neglected. Just as a person’s clothing affects the impression they give, what you display behind or around a character influences the overall impression.
This section describes MMDAgent-EX features related to scene settings other than the CG character.
- Space color
- Background and floor images
- 3D stage
- Screen frame
Drag & Drop
Windows only: You can also change images by dragging and dropping image files from Explorer onto the background area.
- Background: drop the image
- Floor: drop the image while holding
CTRL
Space color #
The default color of the space (the color of empty space) can be set in the .mdf using campus_color. r,g,b specify the R, G, B intensities from 0.0 to 1.0. The default is a deep blue (0,0,0.2).
campus_color=r,g,b
Background & Floor #
You can set or change the floor and background images by issuing the STAGE message. Specify two images in the order “floor image,background image”. .png and .jpg are supported.
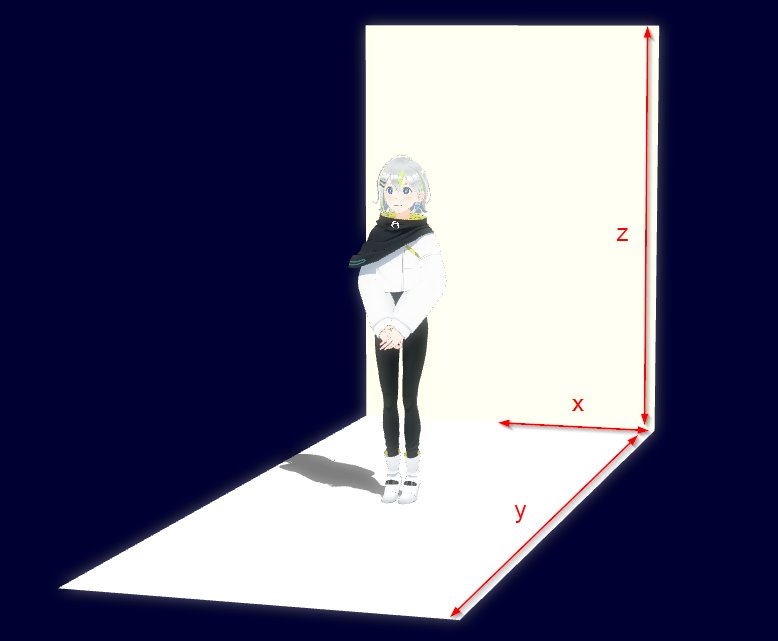
In the scene, the floor and background are displayed as planes. You can change the size of these planes in the .mdf as follows.
stage_size=x,y,z
x,y,z specify the lengths of the respective parts below. Note that x represents half the width.
Stage model #
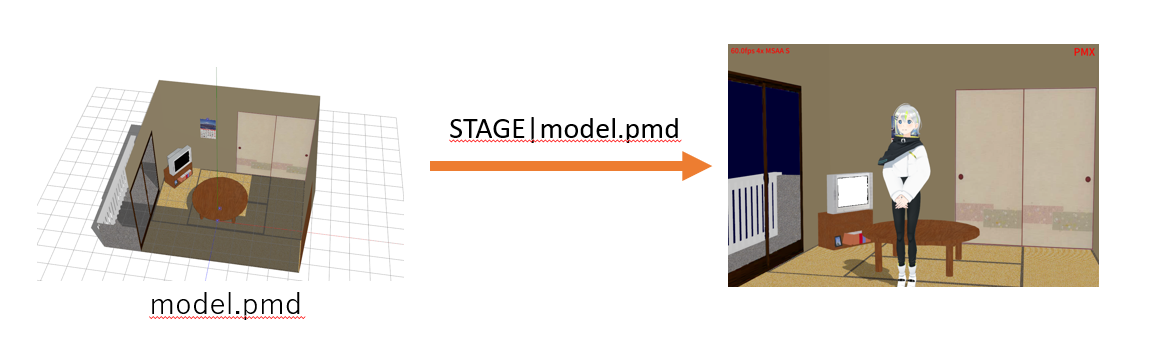
You can represent the entire scene using a 3D model for the stage. Only .pmd format (including ones converted from .pmx) is supported. Specify the model file with the STAGE message.
Note: when a stage model is used, the floor and background are not drawn.
Below is an example when a sample in the Example stage folder is specified with STAGE.
Window frame #
With the WINDOWFRAME message you can overlay any PNG image across the frontmost area of the screen. Transparent PNGs are supported, so you can use a transparent image to place a frame over the screen as shown below. Use WINDOWFRAME|image filename. Examples:
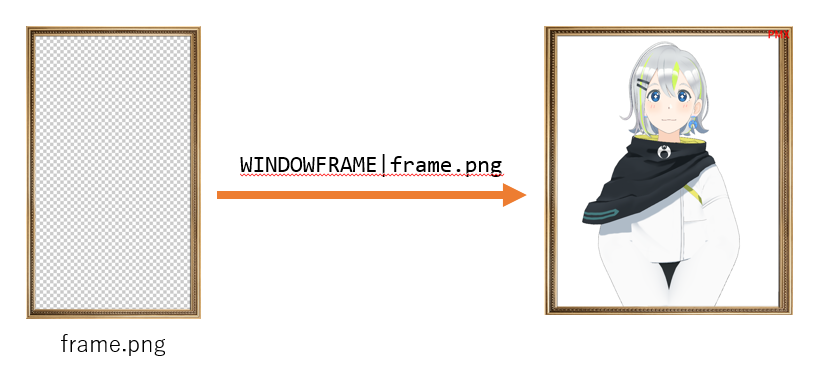

You can switch the displayed frame with WINDOWFRAME|another image filename, and remove it with WINDOWFRAME|NONE to return to the original state.
To layer multiple images, use WINDOWFRAME_ADD. Add with WINDOWFRAME_ADD|name|image filename. Using different names stacks images; specifying a different image file with the same name replaces the currently displayed image.
To delete a frame, use WINDOWFRAME_DELETE|name to remove the frame with the specified name.
Alternatively, use WINDOWFRAME_DELETEALL to remove all frames at once.